Quick start
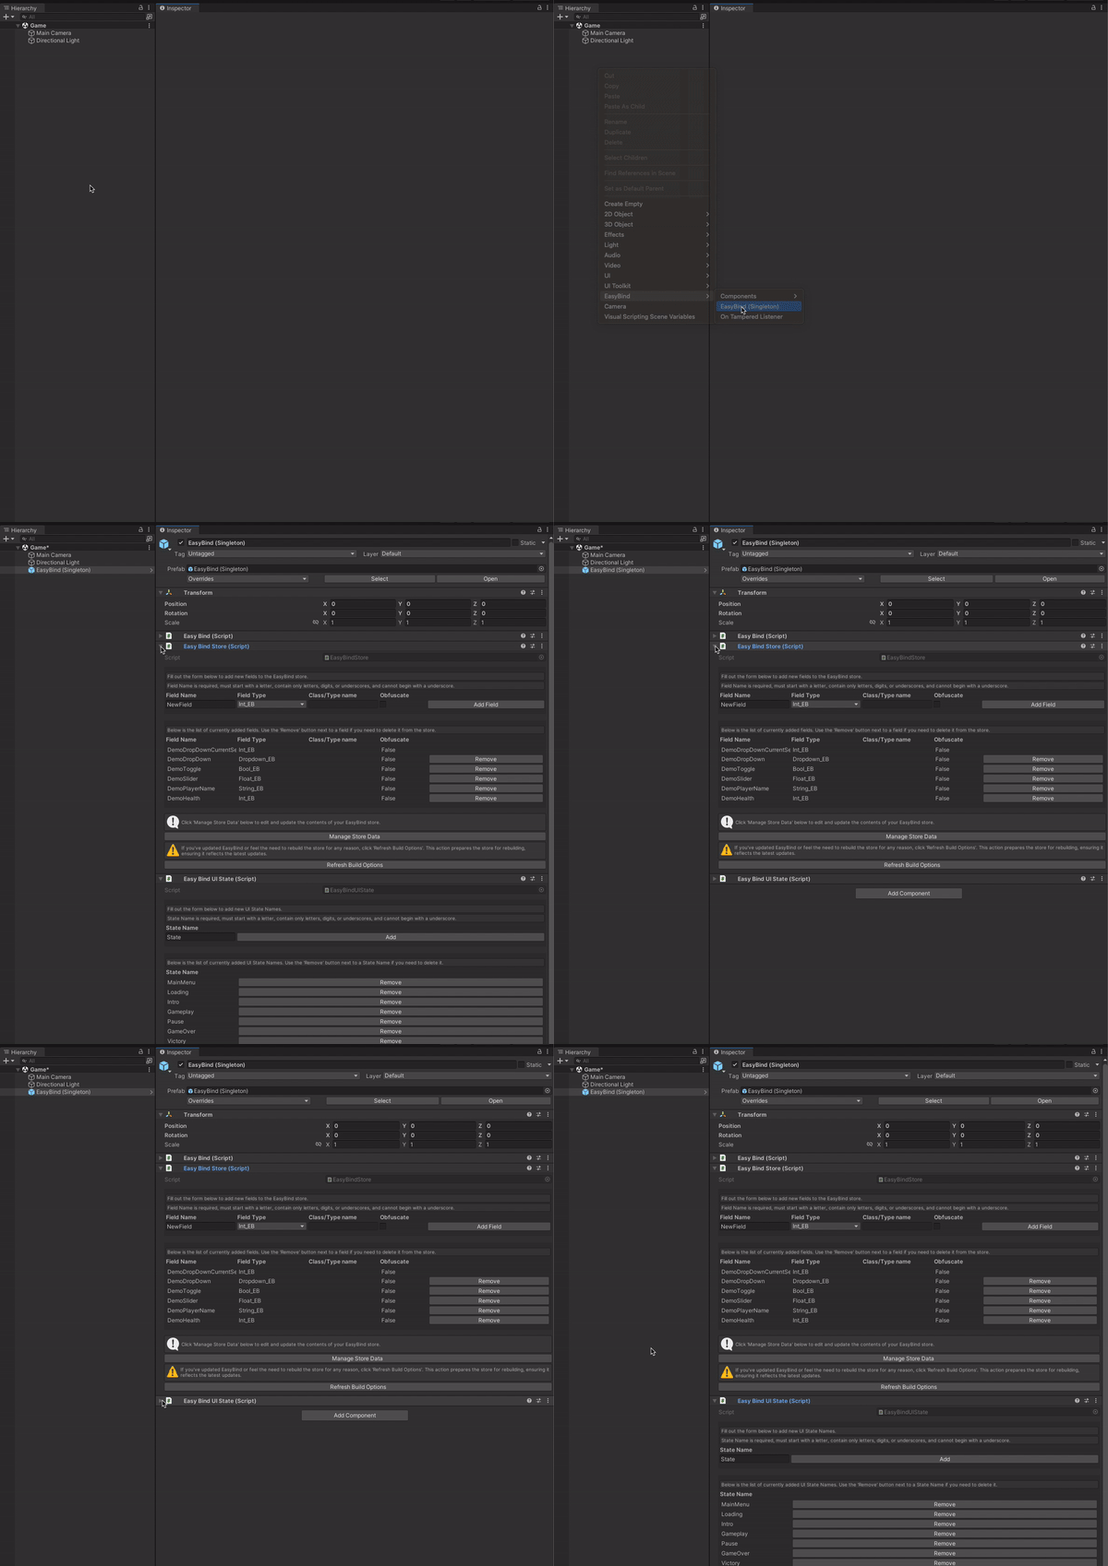
Add EasyBind in your scene
Incorporating EasyBind into your scene requires adding an EasyBind Object. Note: Only one EasyBind Object is allowed per scene. If your project includes multiple scenes each with an EasyBind Object, only the object from the first-loaded scene will persist.

Creating properies

- Assign a unique name to your property, adhering to the naming conventions provided.
- Select the field type from the dropdown menu.
- Depending on the field type, you may need to specify a class/type name or choose to obfuscate the data.
- Click on the Add Field button to create the property.
- Don't forget to hit the Build Store button to update the store with your new property.
Removing properies
To remove a property, simply click on the Remove button next to the property you wish to delete, and remember to press the Build Store button afterwards to apply the changes.
UI Game state

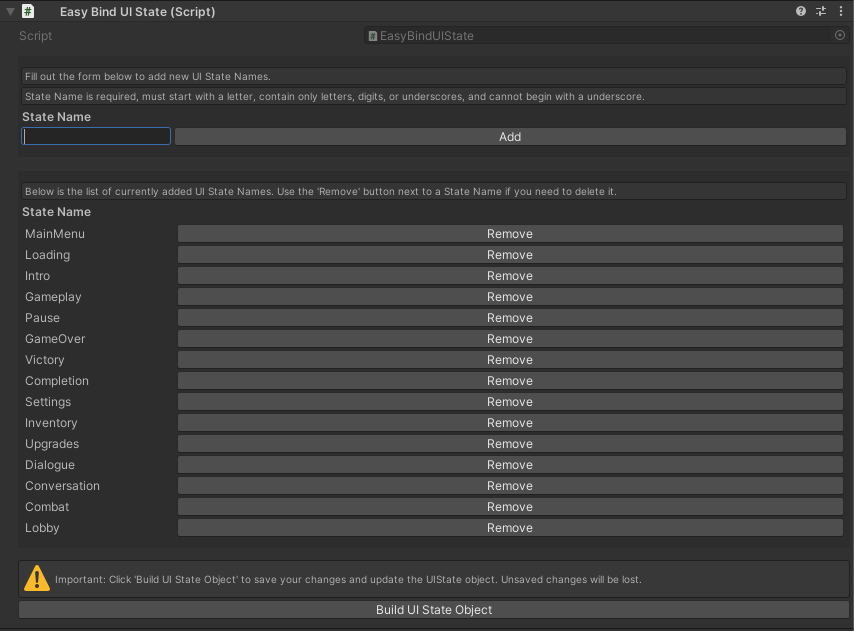
At the interface's top, there is a form dedicated to the creation of custom state names. This tool allows for the personalized naming of UI states, catering to the specific needs of your project.
In the center, a detailed list displays all available state names, complete with an option to remove any state as required. This list ensures you have a clear overview of the existing states and the flexibility to manage them efficiently.
A single action button is provided:
- Build UI State Object: Essential to maintaining the functionality of your UI states, this button must be pressed after any modifications to the state name list. Activating this button initiates the generation of the necessary underlying scripts, ensuring your changes are effectively applied and your project remains up to date.